Creating a core node: 2
3. Adding the description
At this point we have a new node which will load and run, but doesn?t appear in the asset browser and doesn?t do anything. So first, we need to create a description for it.
For this we need the resource editor but there?s a catch. The SDK docs state that ?...you can right-click in the Node Editor and select Edit Resource to open a separate Resource Editor window.? This is correct, but if you do that you will see this:
This is of no use to us because we can?t select the database to be created and description to be edited. For this, we have to run Cinema with two flags on startup. These are:
g_applicationRepositoryWritable=true

      g_descriptionEditorDeveloperMode=true
On Windows, the easiest way to do this is by creating a new shortcut to the Cinema 4D executable with those flags added, like so:
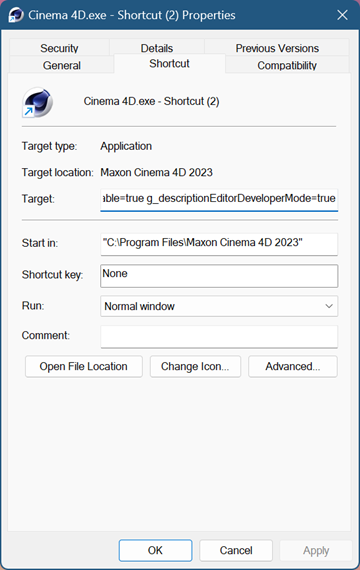
In the ?Target? field this is command line:
"C:\Program Files\Maxon Cinema 4D 2023\Cinema 4D.exe" g_applicationRepositoryWritable=true g_descriptionEditorDeveloperMode=true
Now we can run Cinema using that shortcut but it still doesn?t give us what we need if we try to open the resource editor from the node editor context menu. At present the resource editor can?t be found in any of Cinema?s menus, so you have to run it either by using the Command Manager (Window?Command Manager?) or by using the Commander (press Shift-C). In both cases, type in ?resource? and the resource editor can then be run and you see this:
![]()
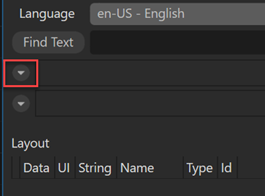
Now we can choose a database, and add/edit descriptions. We click this little arrow here:
We then get a long list of all the node description databases that exist. Most of them have an arrow on the right indicating a sub-menu. The sub-menus are a list of all the descriptions contained in that database. For example, if we hover over the database net.maxon.nodes_corenodes.module we see a long list of the descriptions for the core nodes shipped with Cinema. Our database will be somewhere in that list; in this case, it?s at the bottom of it like so:

I don?t know if new databases are always at the end of the list or if they are sorted by name by the resource editor. Anyway, if we select our database from the list, the resource editor looks like this:
Note that in the list of databases, there was no arrow against our database. That?s because it doesn?t have any descriptions in it yet. The selected description (if there were any to select from) would be shown in the currently empty field below our database name.
Now we add the node?s description. From the Description menu we can click Add Description and in the small window type the name of the description. As far as I can see, as long as this is unique it can be anything, but it makes sense to use a name which shows it belongs to the database we are editing, so in this case we can use uk.co.microbion.splitvelocity.splitvelnode and then click OK. The resource editor now looks like this:

If at this point you click ?Save Changed Databases? from the ?Database? menu, you should see a single .json file named uk.co.microbion.splitveldb.db.json appear in the res/nodes folder of the plugin. This is the root database file.
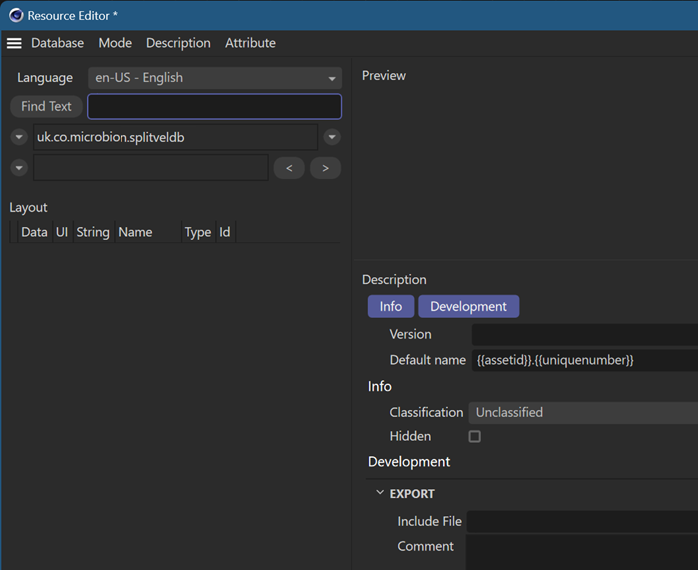
Before we can add any ports, there are some changes to make to the node. The right-hand pane of the resource editor currently looks like this:
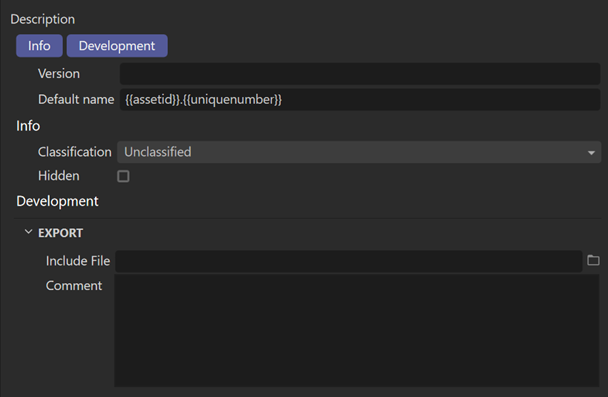
The very first thing is to change the classification. From the drop-down menu, we choose Node because that?s what this is. Several other settings then appear:
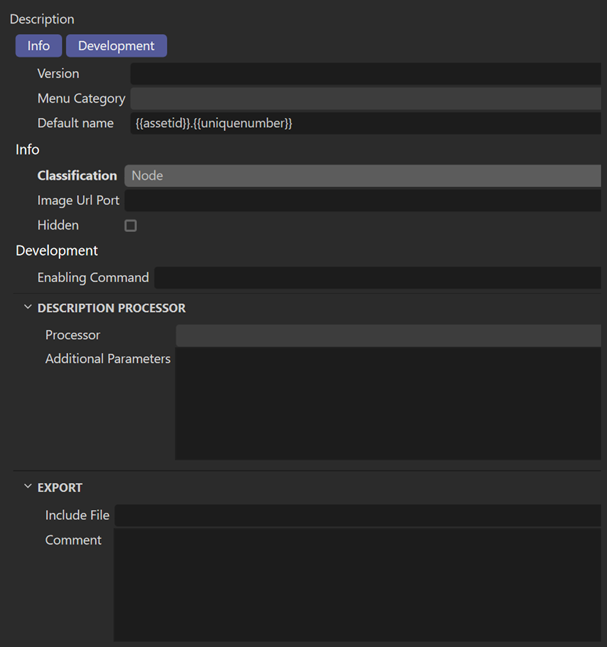
We need to make the following changes:
- Menu Category: this is where the node will appear in the asset browser. Clicking this will give a huge list, but we want the
Uncategorizedcategory, so either we browse the list or (much faster) start typing the name of the desired category. By the time we type ?unc? the desired category should be shown in the list (probably is the only entry, in fact). - Processor: this is the processor for the description. There are several options but we?re creating a core node, so we select
CoreNodeDescriptionProcessor. - Additional Parameters: the SDK docs say that this is ?The core node ID.? but the example core node supplied with the SDK uses the ID of the description, so we?ll use that here.
- Include File: this is very important but we?ll leave it empty for the moment.
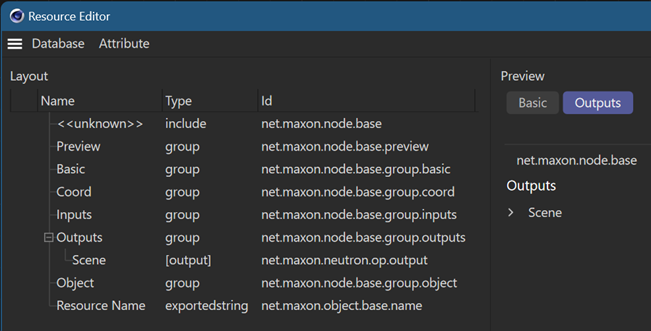
The resource editor should now look like this:

At this point we should save the changed database as above, then we are ready to add some description elements. That is covered in the next page.
Page last updated July 10th 2023