Adding your own R23 plugins
Note: written for R23 and later versions of Cinema 4D. Parts may also be applicable for R20 through S22.
Assuming you have successfully built the SDK examples, you can now add your own plugins. To demonstrate this I will use the example plugin I made available for R19 and earlier called 'ToggleGI' and convert it to build and run in R23. All it does is toggle global illumination on and off in the render settings, so not exactly useful but it makes a quick demonstration. You can download it here.
There are two things we need to do: create the required project definition files and modify the source code as needed.
1. Create the solution project definition file
This file must be named 'projectdefinition.txt' and must be located in the plugins/project folder. If you built the SDK examples, that file already exists and its contents will look like this:
Platform=Win64;OSX

      Type=Solution

      Solution=\

plugins/cinema4dsdk;\

plugins/maxonsdk.module;\

		plugins/microsdk
This is really simple. All it does is tell the project tool which plugins to build and the relative path to them. So I'll start by adding a new folder called ToggleGI to the plugins folder, then add that to the project definition file. Now the file reads like this:
Platform=Win64;OSX

      Type=Solution

      Solution=\

plugins/cinema4dsdk;\

plugins/maxonsdk.module;\

plugins/microsdk;\

		plugins/ToggleGI
As you can see, this simply points the project tool to the new plugin folder.
2. Create the plugin project definition file
First, I add a folder called 'project' to the ToggleGI folder. Now we need the project definition file: this is also called 'projectdefinition.txt' but its contents define the actual project and are quite different to the file of the same name which was modified in step 1. Fortunately, we can use the file from the SDK example, which looks like this:
// Supported platforms - can be [Win64;OSX]

      Platform=Win64;OSX
    // Type of project - can be [Lib;DLL;App]

      Type=DLL
    // API dependencies

      APIS=cinema.framework; \

      crypt.framework; \

      core.framework; \

      command.framework; \

      image.framework; \

      math.framework; \

      mesh_misc.framework; \

      python.framework;
    // C4D component

      C4D=true
    stylecheck.level=3 // must be set after c4d=true

      stylecheck.enum-registration=false

      stylecheck.enum-class=false
    // Custom ID

      ModuleId=net.maxonexample.cinema4dsdk
You can read about the syntax and options of this file in the SDK documentation, but in this case it will work just fine for this plugin. The only thing that must be changed is the last line, where the ModuleID must be changed to refer to my domain. So in this case the last line will be this:
// Custom ID

		ModuleId=uk.co.microbion.togglegi
This file must then be saved with the name projectdefinition.txt to the folder plugins/ToggleGI/project.
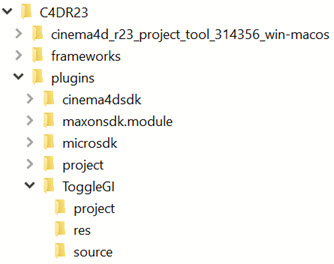
3. Add the source code and resource files
This is simple, I can just copy these folders from the R19 version of the plugin. The folder structure will then look like this:
4. Build the plugin
First, we have to run the project tool to update the solution file and add the project files to the plugin. Refer to the page building the SDK examples for information about that.
Load the plugins.sln file from the plugins/project folder and build it. It will result in some compiler errors and the build will fail. Let's fix those.
5. Fixing build errors
Fortunately, for this plugin, fixing the build errors is easy. Several are errors when using literal C-style strings (just use the String class to wrap them) and most others are changes in the API naming. For example, when adding an undo step, UNDOTYPE_NEW in the R19 API becomes UNDOTYPE::NEWOBJ.
Once you fix all these, it compiles without errors and works fine in R23 and S24.
If you want to try this, download the original ToggleGI files and give it a go.
Page last updated June 29th 2021